Sunday, August 22, 2010

Wavelength socks

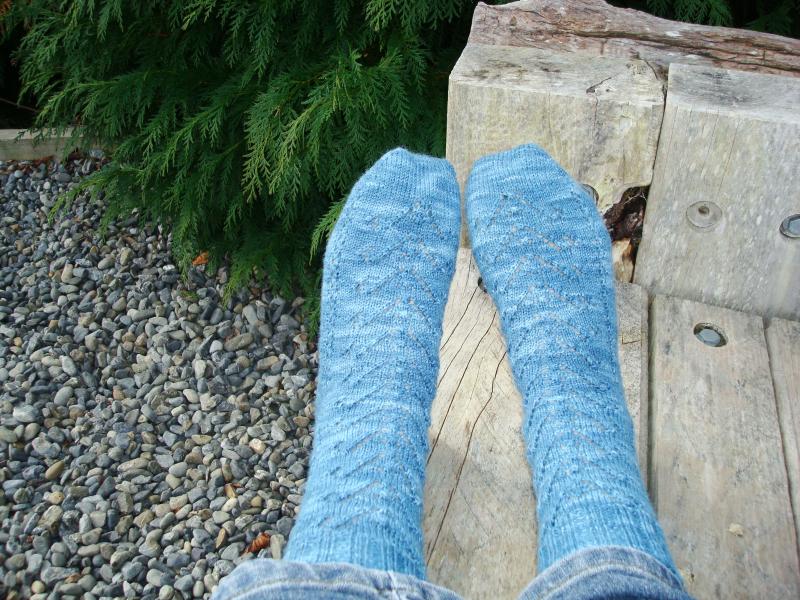
Here are some socks I´ve just finished for wonderful Jellyspec up in Kapiti, who has just started her doctorate - way to go Jellyspec! These are congratulatory and thank-you socks for her.

The pattern is an adaptation of the Wavelength pattern from the book Toe Up 2 at a Time Socks.
I knitted them one at a time though. I hate to say a bad word about a book, but personally I really did find the 2 at a time book patterns hard to follow. I totally ignored the bulk of the sock pattern and just followed the little graph of the actual pattern stitches. So this is basically a Wendy Knits pattern sock, with a differently spaced Wavelength pattern from the 2-at-a-time book on top.

The wool is lovely soft Fibre Alive wool (colour Winsome Win) from Greytown´s wonderful shop Joy of Yarn, sold to me by the very helpful James, who even held my baby for me there while I popped to the loo.
Castlepoint, North Island, New Zealand

The On-Hold Sock by Wendy Knits

Here are my feet enjoying a happy day at the Short Straw Cafe in Whitemans Valley with the new On Hold Socks I´ve finished. The Pattern is from Wendy Knits Socks from the Toe Up. What a wonderful book this is. There are lots of other patterns in it which I´ll be doing soon. The wool is Regia wool; I´ve forgotten the colourway. Bit scratchier than expected, so I won´t knit this brand of wool again. Now I´m working on the Monkey socks from Cookie A in lovely soft Needlefood Sweet Chilli wool.

View from Summit of Mt Taranaki, North Island, New Zealand

Friday, August 20, 2010

Over t-shirt vest with cowl neck

Just finished a blue over-t-shirt vest for spring/autumn. Its made from a gossamer thin knit from Global Fabrics in Wellington (the entire vest folds up in my palm). I designed the pattern myself after reading Cal Patch´s wonderful book Design it Yourself: Patternmaking Simplified. Its basically the tshirt pattern which you draw up from p 58. I did a scoop neck on it, and then a cowl collar. I wanted something different for the hemline, so I did a satin stitch hemline, which creates the wobbly effect at the hem.

I think cowls are mainly made by either adding lots of extra fabric to the neckline (bit like a peasant shirt) & then extending the neckline to create a cowl, or by having an ordinary tshirt and collar & adding a cowl collar. I did the latter because I wanted a fitted garment, without lots of extra fabric draping under then neck/bust. I´ve seen the former kind around where the garment has been given a cowl neckline by adding fabric to the neckline then made more fitted by taking it away again at the sides, and that seemed to create lots of pulling on the torso of the garment to me (just not what I wanted, although I´m sure lots of people have made super garments doing that).

My cowl is 52cm along the inner neckline (because I did a low scoop neckline on the tshirt), 90cm on the outer neckline, and 10 inches width. I think this turned out OK, but if I did ever make one again, I would make the outer neckline more like 80cm. I wanted an oversize cowl, but I also like it to be sort of ruffly (as opposed to flat sitting) and the cowl I made was borderline in this regard.
Although this cowl isn´t heavy due to the fabric, I used straight stitch (as opposed to a stretch stitch) along the neckline. Inside, I also turned under the edges of the seam and sewed them under to create more strength along that inner neckline seam (where the cowl joins the tshirt).

In my post-pregnancy state, it took me quite some time to figure the whole cowl business out. Here are my hastily written ¨notes to self¨in case I make another one sometime. They are probably illegible and cryptic, but I thought I´d post them anyway (if it saves just one other woman enough time to have a chocolate bar, then its been worth it), so if anyone in internet-land wants any clarification, just ask. I´m not a professional dressmaker, so no promises of correctness! I´m sure someone a ¨few notches¨ better in the sewing world could explain it better and more correctly ;o)


Beach at Porangahau, North Island, New Zealand


Thursday, August 19, 2010

More bags

Next on the sewing list: here are some shopping bags I've just made for my mum as a birthday present. They are the usual 20 x 24 inch bag, corners sewn at the base, french seams. I've sewn the handles under with the turning over at the top, so the handles get stitched over twice, which I think adds alot for strength.

Linocutting and block printing

I´ve lots of projects on the go at the moment. First, I´m slowly cutting out the Alabama Stitch book pattern Angie´s Fall. Man, this is taking ages, and the mylar sheet seems so heavy and thick to cut. It even broke my knife. I´d seriously consider ordering the ready-made stencil from Alabama if I didn´t live on the other side of the world.

While I´m trying to locate a medium mylar sheet to see if this is easier to cut (I can´t find one in this entire country so far), I thought I´d try my hand at linocutting. I´ve fallen in love with Lena Corwin´s book Printing by Hand. She describes everything really well and the book is so well set out. Above is my first go at linocutting / block printing. Its a daisy from my garden. Cutting the lino is great and its easy to do a few cuts when I get a few seconds free. However, it took me ages to print it properly (too much paint, not enough paint, trying different colours, adjusting the pressure on the stamp, adjusting the length of time the stamp is on the fabric). I bought a brayer from Mitre10 (alot cheaper than an art one) and this made a huge difference to the clarity of the printing. It is printed on unbleached calico. I think I´d get a better print on a finer cotton fabric.

This is my second go at a linocut stamp, which I´m hoping to print on bags etc that I make. This print was made on calico, before the brayer purchase, but I haven´t had time to re-do it yet. The chicken I drew is our boss-chicken Susie, a Light Sussex.


Kaikoura, South Island, New Zealand

Friday, July 16, 2010

Stripey socks


Here are some stripey socks done in Australian Heirloom sock wool (I´ve lost the tag unfortunately, so until I find it I can´t say what colourway it was...) which my lovely mum sent me from Australia as an early birthday present. I finished them this morning. The baby I made last year - very happy with him. The socks are just stockinette stitch (the slip stitch heel sock from the Socks from the Toe Up book) and are the ¨easy¨ socks which I knit when I´m tired or just sitting outside with the chickens etc (when it hasn´t been raining). I´m still working on the blue On Hold Socks from the Socks from the Toe Up book as my ¨tricky¨ sock. which I knit when I have peace and quiet. Next easy sock will be the Spring Forward sock from green Joy of Yarn wool (Winsome Win) for wonderful Jellyspec!

Monday, July 12, 2010

Vest I designed

This is a vest I drew up the pattern for after reading Cal Patch´s wonderful book Design It Yourself: Pattern Making Simplified. Its from the basic T pattern in the book (p58), just without sleeves. The neckline isn´t too different from that in the book, but of course, I´ve put a cowl-like collar on it. Its from the same material as the stretchy shirt I made, although I´m hoping a bit funkier... The fabric is difficult to see in the pics, and my camera has totally failed to pic up the colour correctly (its actually a much nicer shade in reality than what the pics have shown here).

I experimented with freestyle gathers, inspired by this shirt, whose maker was in turn inspired by this website. Basically, I just cut the pattern out as per the basic-T in the book, allowing an extra couple of cms. Then I did all the freestyle gathers, which are only 1/8 inch wide, done on the right side. The tucks weren´t hard to do - I didn´t pull or stretch the fabric unnaturally, but just changed the angle of the sewing every so often to create curves. I´d do them a bit wider next time (1/4 inch?) as they are a bit difficult to notice. Then I lay the pattern over the finished fabric again, and trimmed it to be exactly like the pattern I drew up, and sewed it together as per usual. The cowl is one layer of fabric only, sewn wrong side (of cowl) to right side of top, so that the cowl then sits up and lays on top (probably makes no sense... :o)) Also, next time, I would extend the shoulder line by about a cm, so it kind of sticks out a bit. Can´t quite put it into words, but I think it would look a tiny bit more like some of the shoulder lines on the clothes that Makeshift makes, which I really love.

Worser Bay, Wellington, New Zealand