I can either do all sand coloured pieces (which I thought goes with the sea theme):


Or I can do orange vs blue pieces. I like this, but visually, I think the blue seems to bring the whole thing down. Mmmm. [I´ve since finished this game here.]


 I´ve been puzzling how to stamp a checker/draughts board without getting the squares out of alignment - its a lot of ask to place 16 stamps corner to corner without going awry. [I´ve since finished this game here]. I figured that the way to do it is to have a blank stopper piece (could be made of anything, but in this case I´ve use an old piece of lino) placed in the blanks between the stamped squares. Wherever a blank is placed, all the stamps on each side of the blank get stamped. Before the final stamp is removed, the blank piece is moved to another blank spot next to the stamp.
 I might even just go with different colour fish pieces and leave our the boat stamps altogether. That would be a shame considering how much work I´ve put into it, but I guess I´ll use those stamps on another project.
 Near Dunedin, South Island, New Zealand
 Near Christchurch, South Island, New Zealand
 This is a small bag which I´ve made for my son to keep his word cards in (the ones they give you at school to play word games with). The fabric is from wonderful Jellyspec´s fabric stash (thank you!!). Its about 8 cm tall.
 Sunset at Gisborne, North Island, New Zealand
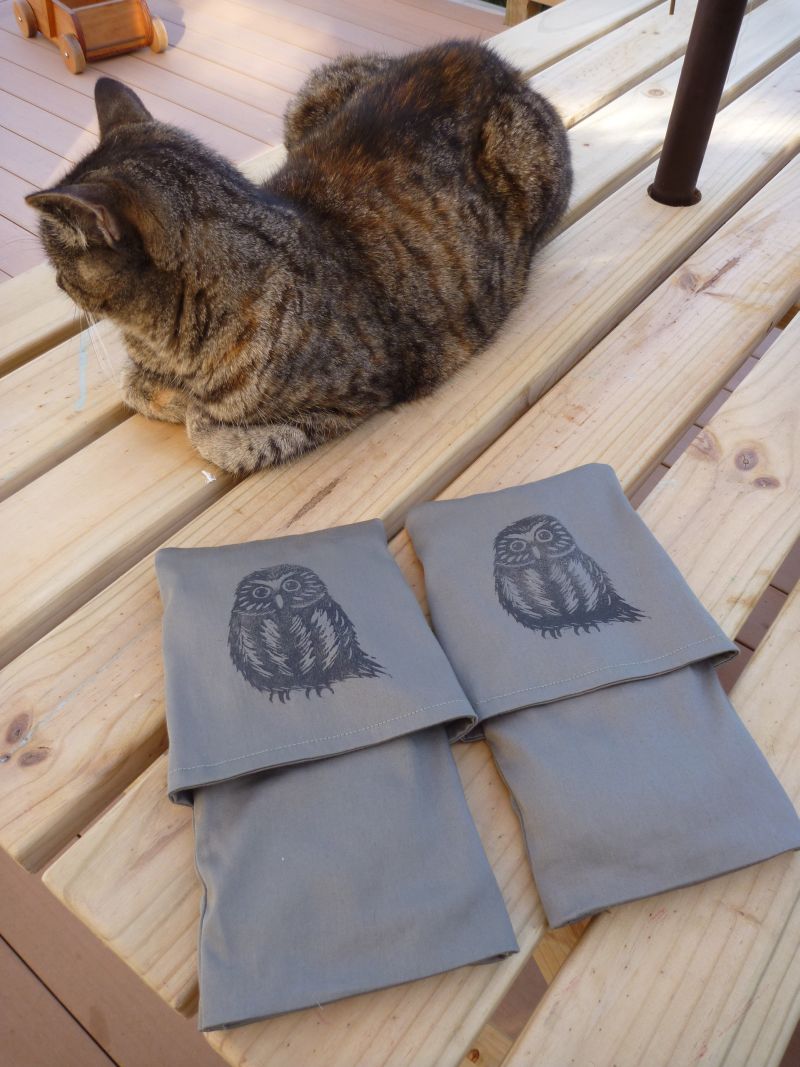 This is the sort of thing I had meant to do with my linocut stamp of a ruru owl. Its taken me months to get around to it. I´ve made these feet wheat packs from my own pattern for one of our Playcentre members who has just finished the Te Puna course. The wheat packs are removable and washable, and the outside cover fits over the wheat packs like a pillow. I´ll get around to putting the pattern and instructions up one of these days...
 Queen Charlotte Sound, South Island, New Zealand
 I´ve carved another fish linocut stamp for my handsewn draughts game pieces. I think this will be one side of the fish pieces (the 3 minnows will be the other side). I carved another fish because the fish has to take up most of the space on the beanbag or else its too hard to see which pieces are yours and which are the opponent´s. The previous single fish stamp was too small.
 On the way to Sunrise Hut, North Island, New Zealand
 I´ve recarved the checker board linocut ocean waves stamp and this will be the final one. I want to print ithe checkers board now, but my fabric is 2cm too narrow. Argh! I´m thinking of lopping off half an inch on the edges of the stamp just to save another trip to the fabric store...
 Porangahau, North Island, New Zealand

 Wellington Harbour (view from our old flat), North Island, New Zealand
 I´m sewing a checkers game for my 5 year old, and the pieces and board will be printed with linocut stamps I´m carving. The pieces will be very flat, circular beanbags. [Click here for the finished game]
 This is the original drawing.
 This is how I originally carved it. I think its not bad considering I carve in short bursts between cooking dinner/ working/babies. But I think I got a bit confused about whether it is a white design on black or a black design on white. I tried to correct it as much as I could in the big pic above. I almost like the photo of this better than the final version above, but in real life and in real size the final pic above looked better.
 I use a cheap foam brayer which soaks up a lot of paint, which just gets washed out afterwards. So I thought a rubber brayer might be better. Nope. The rubber brayer (used in this pic) doesn´t seem to be able to transfer enough paint for fabric printing, although I think it might be good for paper printing. So, back to the foam brayer.
 Now that I´m confident that some sort of checker board is possible, I´m moving back to the pieces. I need to work out a black piece and then I can see what size of board will allow the black pieces to stand out OK against the backgrounds. I´ve settled on some sort of boat design for the black pieces. Left is the original design.
 Then I draw over the main parts of the design in 2B pencil.
 Then the design is put face down on the lino and rubbed on the back with a pencil to press the pencil markings onto the lino.
 The transferred design is very faint (and in mirror image, of course), but it is clear enough to redraw over OK.
 The design is then carved, and cut out with scissors. The lino is stiff to cut, but its not hard to do. I usually cut a deep line along the line I want to cut out with scissors.
 Here is the stamp printed on fabric with fabric paint. I´m really happy with how it turned out. The final printing will be just a bit darker. The reverse side of thie piece (the side that is turned over when the piece is queened), will be a cutter sailing boat.
 Mt Lytton (I think), near Christchurch, South Island, NZ
 I´m taking a break from the pieces to work on the board now. I´ve decided to do it in three colours, and have carved a lighthouse and whale stamp. (both need cleaning up on the sides). Here are some quick first prints to see how the stamps turned out (done in a rush while my husband put the baby to bed). I really like how the lighthouse turned out, although I´ll ditch the seagulls, and tidy the sides up.
 These are the two under-stamps. The basic sea, and the wave overlay. I need to pull the stamps off a bit cleaner next time - the paint bled a bit.
 This is how this series of stamps looks together, with some of the pieces on top. The squares are all different in this pic because I´m testing different shades of blue and black. Although I like the whale, I think it makes the checkerboard look too busy. My next step is to recut the ocean backdrop, 1cm smaller, and with no white gap for a whale.
 This is how it looks with a whale, and no sea under-stamp. I like this pic the best, but it doesn´t create a very defined draughts board.
